The content of the article:
- Replacing the brake pads
- Battery check
- Generator belt
- Checking shock absorbers
- Cleaning spark plugs
- Replacing the stabilizer bar
- Replacing the brake fluid
- Replacing the air filter
- Replacing the engine oil and oil filter
- Wheel replacement
All car owners are conventionally divided into three groups:
- Riders... These are drivers who, in principle, do not want to repair anything in their car, they consider any work in the garage difficult and boring, and even a simple refueling is entrusted to the service personnel of the gas station. All malfunctions in the car end for them with a repair in a car service.
- Novice driverswho want to understand the structure of their car, they like to repair something with their own hands, but for a full-fledged repair there is no necessary knowledge and tools.
- Professionals... These are not only those drivers who are connected with cars for work, but also car owners who consider repairing their hobby. They like to understand the complex structure of car systems, they "enjoy" the fact that the repaired unit is working correctly, they enjoy not only the trip, but also the process of servicing the car.
Fortunately, “riders” are not so common among drivers, most beginners quickly become professionals, and there is no part in a car that they cannot repair on their own. Here are a few main automotive components and assemblies that the driver can repair or replace in the garage, having the minimum of the necessary tools.
- Replacement of brake pads;
- Battery check;
- Elimination of whistling in the alternator belt;
- Checking shock absorbers;
- Spark plug repair;
- Replacing the stabilizer bar;
- Replacing the brake fluid;
- Replacing the air filter;
- Replacing engine oil and oil filter;
- Wheel replacement.
Replacing the brake pads

The brakes in the car are the main safety component. In Soviet times, it was taught that the driver may not thoroughly know how the engine works, how exactly the exhaust manifold system works, but the brakes must be in perfect condition. Understanding the operation of the brake system, keeping it in optimal working order and being able to replace the brake pads is what a beginner becomes a pro.
Signs of node wear:
- Squeal when braking.
- Severe vibration and beating of the vehicle during hard braking.
- Uncharacteristically long stopping distance.
These external signs help to immediately determine that the brake pads should be checked and replaced. Of the tools, you will need a simple set, which should be in the garage:
- C-shaped clamp, designed for pressure on the caliper. For some machines, an individual repair kit is provided.
- A wrench to loosen the caliper bolts. They are selected for a specific model.
- Wheel nut wrenches.
- New brake pads.
- Respirator, goggles and gloves. Optional.
Battery check
Testing the battery begins with an external inspection. If you develop a habit, each time focusing on the integrity of the case, the appearance of oxidation on the terminals of the terminals, when the hood is opened, you can avoid annoying cases when it is impossible to start the car. The "dying" of the battery does not happen in one day.
If the terminal is loosely screwed to the current terminal, active oxidation begins on the surface. Oil, electrolyte, dirt should be removed from the surface of the unit regularly. The performance of a battery will gradually deteriorate if the battery loses its charge due to conductive deposits.
With the engine running, you can check the serviceability of the voltage regulator and the battery charging from the generator. To check the battery you will need:
- Multimeter, which checks the voltage on the battery. This device will show the state of charge of the battery, help determine which of the cans is out of order.
- Load fork... An alternative tool that will show the state of charge.
- Hydrometer will determine the density of the electrolyte.
Generator belt
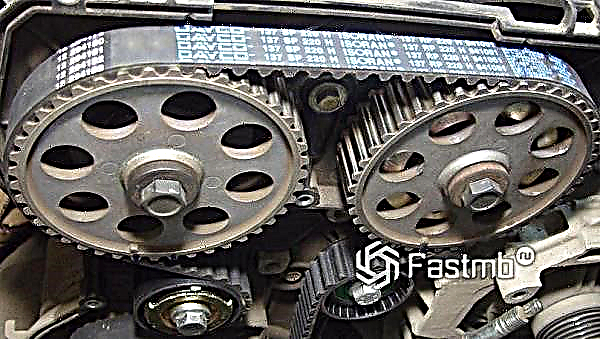
Quite often, drivers are faced with a problem: for no apparent reason, a new alternator belt begins to whistle. If this part is worn out in the car, it is simply replaced, but everyone should know why a whistle may appear with a new belt.
Whistling reasons and remedies:
- The tension has not been adjusted. Tighten the slack belt.
- Microcracks in the belt. Replace with a new one.
- Dirty shaft. Remove the belt and remove all deposits from the shaft.
- Displaced pulley line. Checking and adjusting the line of displacement of the pulleys, which should be on the same plane.
- Failed bearing. Replacement of a part.
Many professional drivers share with newbies the secret of choosing a alternator belt according to the degree of rigidity. A too tight belt will cause an unpleasant whistle in winter, only after the engine has warmed up the noise will disappear. therefore when choosing a belt, you need to pay attention to the rigidity and density of the part.
Checking shock absorbers

Most cars have non-separable shock absorbers, and it will not be possible to repair them in the garage - the unit simply changes to a regular new one. But you can make a diagnosis of the shock absorber yourself. To do this, you just need to rock the car by pressing vigorously on the front fender. If the car stops quickly and dampens the vibrations, there is no problem. If the car sways for a long time, like jelly, professional repair is required.
In addition, if there is a knock in the shock absorber assembly, there are oil leaks, you need to replace the non-separable part with a new one. To repair a collapsible shock absorber, you will need a professional tool:
- Spring puller.
- Keys set.
- Rags.
Cleaning spark plugs

If the driver does not have the time or desire to repair this small part, you can simply purchase a new one. Cleaning the candles is quite simple to do on your own - this requires a minimum of tools.
SZ have a period of operation established by the manufacturer up to 30 thousand mileage. It is during this time that the burnout of the electrodes occurs. If there is a lot of wear on the contacts in the candle, then the candle is rejected unambiguously. If there is a whole insulator in the part and practically worn contacts, the candle is quite easy to restore.
Parts are inspected twice a year (manufacturer's recommendations - once a year). Repairing a candle means cleaning the part from carbon deposits, deposits and build-ups that form during the period of operation.
Replacing the stabilizer bar

The main challenge even for professionals is accurate diagnostics, which will show that the stabilizer bar needs to be replaced. A sign of a malfunction in the suspension is always the knock of the car when driving over slight irregularities. Any pothole gives off a loud knock in the suspension, and this is not always a breakdown of the strut.
If the car does not get out of the roll well (becomes poorly controlled), this may indicate that the rack is torn off. Professional drivers are replacing the front pillars in the garage, this requires only the presence of an overpass or a viewing pit, since the main thing that is needed for a correct replacement is to ensure the stability of the car. Many people get by with a simple jack.
Replacing the brake fluid

A novice driver "is given" two whole years to learn how to change the brake fluid in his car.It is this average period that is determined by the manufacturers of both the car and the technical fluid. The exceptions are racing copies of "Maserati" and "Ferrari". For these models, there are strict replacement rules: after 5 and 10 thousand mileage.
Brake fluids are heated to a temperature of 180 ° C, with emergency braking, this figure jumps to 200 ° C. During operation, moisture penetrates into the brake fluid, its temperature indicators decrease. "Tormozuha" can boil at a temperature of 145 ° C, and this is an emergency situation - the brakes are blocked.
The brake fluid is checked with a tester, this device should always be in the garage. Complete replacement is carried out according to the rules of the technological map. Of the tools, you only need an 8 or 10 wrench, a hose, rags or rags and a vessel where the used composition will drain.
Replacing the air filter

This simple procedure can be carried out independently - a beginner can easily cope with it; for experienced drivers, replacing the air filter is not at all difficult. The air filter plays a significant role in the operation of the fuel system, and how efficiently the filter passes air will determine how the engine will operate.
Replacing the filter takes only 20-25 minutes. In the operating book, manufacturers recommend changing the filter depending on the model. Experienced drivers know to change the filter element at least once a year.
To replace, you need a simple tool:
- Phillips screwdriver set.
- Wrench.
- New filter.
- A paper towel and pliers may come in handy.
Modern cars built after 2010 have closed-top air filters at a distance. In open filter types, the corrugated paper of the filter element is noticeable; in carburetor engines, the open filter cover is located above the engine.
Replacing the engine oil and oil filter

This procedure is of an average level of complexity and takes about an hour for professional drivers. Beginners are encouraged to master this operation at the very beginning of their “driver's career”. This will significantly save time and money in the future.
The correct procedure for changing the engine oil is a guarantee of a long life of the most important unit of the car - the engine.... To replace, you need a simple tool and oil of the required viscosity. This is where the main difficulty for beginners lies - they do not know what viscosity grade and how much oil is required for the engine of their car.
Therefore, verification with the instruction manual for the car is required. Of the tools you will need:
- Funnel (watering can).
- Drip tray or dish for old oil.
- Oil filter wrench.
- Filter.
- Socket wrench.
Before starting the replacement, you should start the engine for a couple of minutes to warm up the oil. There is a drain plug on the oil pan. It is required to loosen the plug with a socket wrench, remove it, let the oil drain and reinstall the plug. Then you should change the filter and fill with new fluid.
Wheel replacement
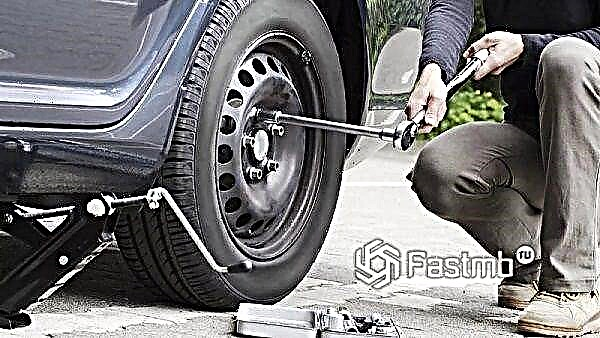
This procedure, no doubt, should be able to do everything, even "riders", because it is not always possible to get help on the track. Of course, the car must always have a "spare wheel". Tools required:
- Jack.
- Jack stand (can be found locally).
- Shoes for wheels.
- Wheel key.
It is important to remember some simple rules before starting work: put the car on the handbrake and engage first gear. These are additional safety measures to keep the vehicle stationary. When installing a new wheel, it is recommended to start with the top fastener.
To summarize, let's say that all mechanical components in the car can be repaired by yourself... Electronic blocks can also be put in order, but here it is not so much practical skills that can be gained from personal experience are required, as academic training.