A step-by-step procedure for repairing the gear lever on a VAZ 2110 car, or rather, replacing the axle bushings.
Any car enthusiast knows from the moment he first gets into the car that the gearbox speeds are shifted using a lever. By moving the handle in the lateral direction, the driver selects a gear and sets it so that the machine moves. With the engine running, you need to move the handle with the clutch pedal depressed, otherwise the transmission units of the gearbox will break down.
The node, which is responsible for the control of gear shifting in the checkpoint, consists of:
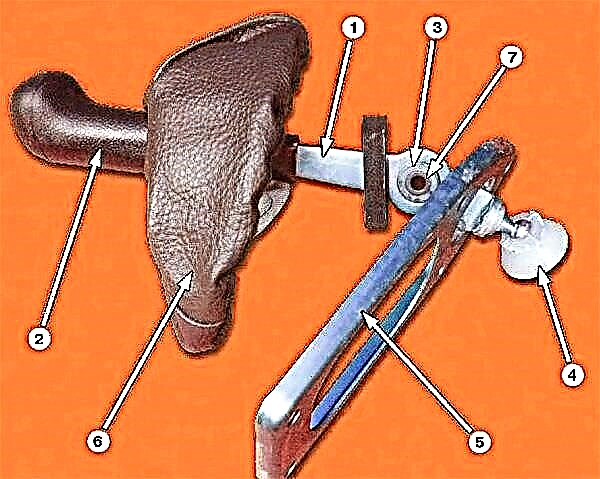
- lever PP;
- his handles;
- bushings;
- lever supports;
- base of the vehicle gearbox;
- leather case;
- lever axis;
Breakage of this node can manifest itself:
- in rattling vibrations and noises during acceleration and braking of a car;
- in difficult movement of the lever.
Most often, the cause of a malfunction can be worn-out parts when the vehicle has traveled more than 70,000 kilometers.
If you disassemble the broken unit yourself, you can see the lever axis and two plastic bushings. If the axle moves freely (dangles) in these bushings, then the bushings have outlived their age and are asking for replacement. We carried out repairs on a VAZ 2110 car, the procedure is similar on other models of this manufacturer. And now a step-by-step order of work.
1. Remove the tunnel floor lining (upper and lower parts).
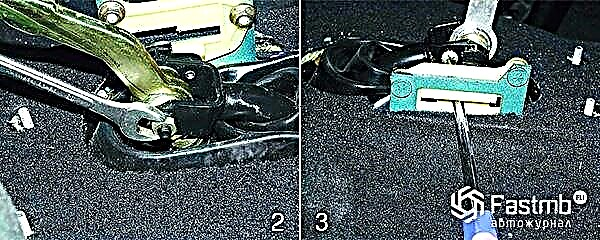
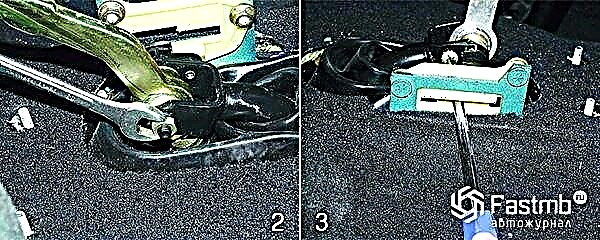
2. The shaft of the gear lever is secured with a nut. It needs to be turned away.
3. The axle stop is fastened with a screw; it must be unscrewed from the inside of the passenger compartment. Be careful - there is a spring washer under the head of this mount.
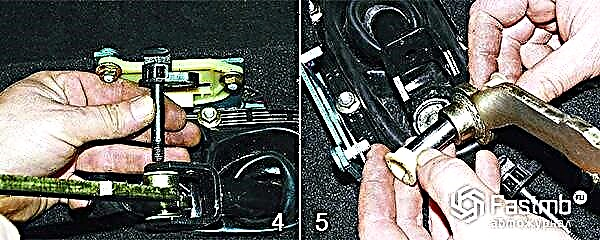
4. Remove the axle by pushing the lever to the side. The axle is removed together with the stop.
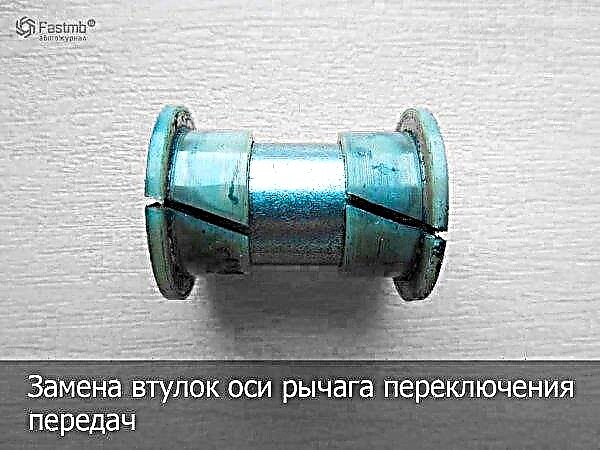
5. Remove both plastic axle bushings and spacer bush by sliding the arm out of the link yoke.
6. If the bushings are broken or worn out, replace them with new ones. The plastic parts are cut, but that's the way it should be.
7. The axle stop and reverse lock bracket cover should be carefully inspected for wear or damage. In this case, they also require replacement in case of obvious wear. The bracket cover is secured with two nuts and one bolt - unscrew them to replace the cover.
8. Grease the plastic bushings of the gear lever shaft. After that, collect the parts again into the working unit by the reverse removal.
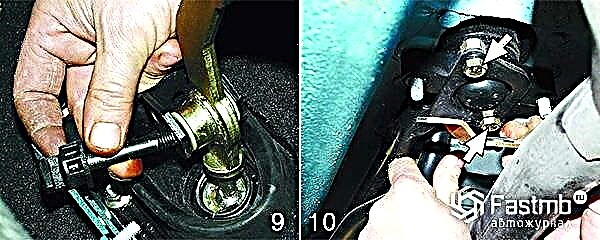
9. When installing the gearbox axle, difficulties may arise. To avoid this, you need to move the lever to the side.
10. For this, the protective plate is removed from the bottom of the car: unscrew two nuts and two bolts of fastening of the reaction rod.
When the axle is installed, put the jet thrust in place. The last thing to do is adjust the gearshift drive.